How to Replace Table Tennis Rubber Without Ruining Your Blade
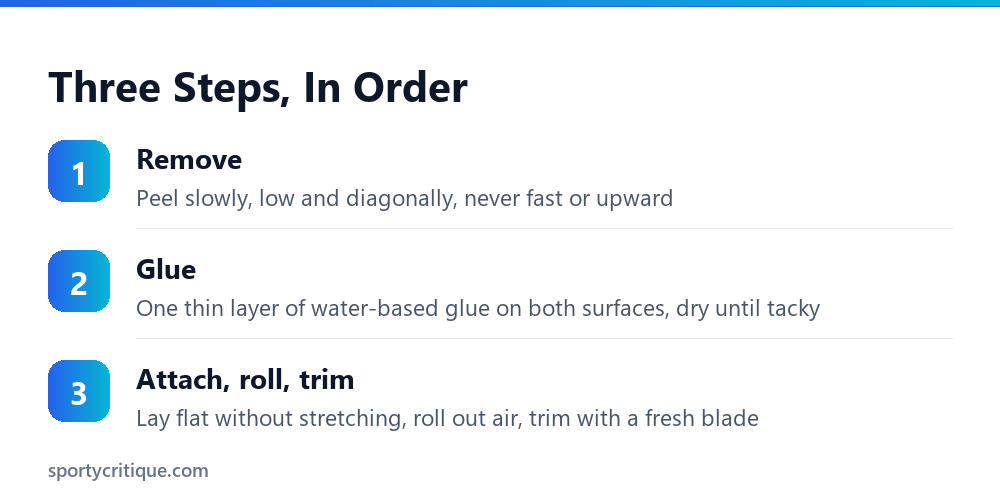
Peel the old rubber off slowly, low and diagonally — never fast or upward, or the blade’s top ply comes with it. Apply one thin layer of water-based (VOC-free) glue to both blade and sponge, let both dry until clear and tacky, lay the rubber down without stretching it, roll out the air, then trim with a fresh blade. Budget 30 minutes for your first attempt.
Rubber is a consumable. It loses its grip and its spring long before it looks worn out, and replacing it yourself costs a fraction of a new paddle. Done well, your setup plays like new. Done badly, you take a chunk of veneer off a blade you paid $150 for — and that damage is permanent.
- →The removal is the risky part, not the gluing
- →Use water-based glue only — solvent speed glues are banned and dangerous
- →Never stretch the rubber when laying it down; stretched rubber plays dead
- →Thin layers, dried until tacky — thick wet glue causes every common failure
- →A sealed blade makes every future change dramatically safer
Table of Contents
When does it actually need replacing?
- A string of the topsheet has torn
- Edges lifting from the sponge
- Visible splits or bubbling
- Replace immediately
- Stays slick after cleaning
- Sponge feels dead — no catapult
- Matte patch where you contact
- This is the common one
- Casual: 1–2 years
- Club player: 6–12 months
- Serious trainer: 2–3 months
- Pro: monthly or faster
The sneaky category is where most players lose performance without noticing. A rubber that has never torn can be thoroughly finished — the tensioned sponge relaxes, the topsheet polishes smooth, and your spin quietly drains away over months. If your loops have lost bite, clean it first; if a proper clean doesn’t restore the grip, it’s the rubber, not the dirt.
What you need
⚠️ Watch out: Do not use household glue, contact cement, or anything solvent-based. Speed glues containing volatile organic compounds have been banned in competition since 2008 — they’re a health hazard in an enclosed room and they’ll fail an equipment check. Water-based table tennis glue is cheap, legal, and peels off cleanly next time. Household adhesives don’t, which turns your next rubber change into a demolition job.
Step 1: removal (the part that damages blades)
Ninety percent of blade damage happens in the first ten seconds of the peel — when people pull upward because it’s faster.
If a section refuses to come away, stop pulling and work at it from the other direction. On an unsealed blade, patience here genuinely is the difference between a blade you keep and a blade with craters in it. This is also the single best argument for sealing a blade — a sealed surface releases the rubber cleanly every time.
Step 2: gluing
Step 3: attach, roll, trim
📊 Note: Let the paddle sit for a few hours before playing — ideally overnight. The glue continues curing, and a fresh bond that gets stressed too early can develop lifted edges within a week.
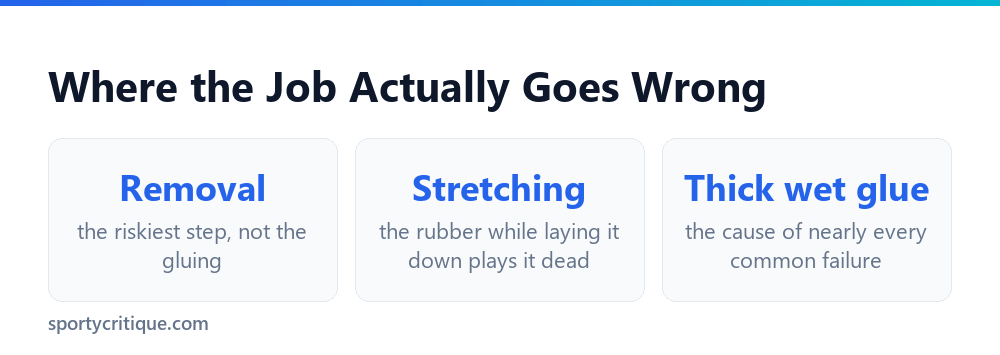
The five mistakes that ruin the job
- ✓Peel slowly, low and diagonally
- ✓Use thin glue layers on both surfaces
- ✓Wait until the glue is clear and tacky
- ✓Lay the rubber down relaxed
- ✓Trim with a genuinely fresh blade
- ✕Peel fast or upward — splinters the blade face
- ✕Slather glue on thick — lumps you’ll feel on every touch
- ✕Attach while the glue is wet — guaranteed bubbles
- ✕Stretch the rubber into position — plays dead within days
- ✕Use household glue — it won’t peel cleanly next time
Can you re-use a rubber you’ve peeled off?
Yes — provided it came away cleanly with the sponge intact. Re-glue both surfaces exactly as you would with a new sheet. Expect slightly less catapult each time you re-mount, because the sponge takes a small amount of stress from every glue-and-peel cycle.
This is genuinely useful in two situations: swapping a good rubber onto a new blade, and rotating rubbers between your forehand and backhand sides to even out wear, since the forehand side almost always dies first. Neither is exotic — plenty of club players do both routinely.
Choosing the replacement (before you peel anything)
A rubber change is the natural moment to reconsider what you’re playing on — and most people waste it by simply buying the same sheet again out of habit.
Two decisions matter more than the brand name. The first is sponge thickness, printed on every sheet as a number in millimetres. Thicker sponge (2.0mm, 2.1mm, or ‘max’) stores more energy and gives more speed and spin; thinner sponge (1.5–1.8mm) gives more control and better feel for short play. Beginners are routinely sold max thickness because it sounds better, when 1.8mm would teach them more.
The second is hardness, usually a number like 37.5 or 47.5 degrees. Softer sponge is more forgiving and generates spin at lower speeds; harder sponge rewards a full, fast stroke and feels dead without one. This is the same tacky-versus-tensor question covered in our brands guide, expressed as a number.
You can also run different rubbers on each side, and most players should. A grippier, faster sheet on the forehand and something slightly more controlled on the backhand is the standard club setup, because the two wings do genuinely different jobs. The only rule is the colour requirement: one side must be black, and the other must be clearly different — since 2021 that can be red, pink, purple, green or blue.
💡 Pro tip: Change one variable at a time. If you switch both rubbers, the thickness and the hardness simultaneously, you’ll have no idea what caused the difference you feel. Change the forehand, play it for a month, then decide about the backhand.
Is it worth it on your paddle?
If you’re on a cheap pre-made and the rubber has died, the honest answer is that you’ve reached the end of that paddle’s useful life. That’s not a failure — it did its job. Our paddle guide covers what a first custom setup should cost, and the premium breakdown explains where the money actually goes.
- →Sealing a blade — makes every future rubber change safe
- →Cleaning your paddle — the routine that delays replacement
- →Rubber guide — choosing your next sheet
- →Brands explained — the tacky vs tensor decision
Frequently asked questions
How often should I replace table tennis rubber?
Casual players every 1–2 years, club players every 6–12 months, serious trainers every 2–3 months. The trigger is performance, not appearance — a rubber that stays slick after a proper clean is finished.
Is gluing your own rubber tournament-legal?
Completely — nearly every serious player does it. Only solvent-based speed glues and boosters fall foul of equipment rules; water-based glue is standard and legal everywhere.
What glue should I use?
Water-based (VOC-free) table tennis glue, from any table tennis brand. Never household adhesives, contact cement, or anything solvent-based.
How long does the glue take to dry?
10–20 minutes to reach the clear, tacky stage where you attach the rubber. Then leave the finished paddle a few hours — ideally overnight — before playing on it.
What if I tear the blade surface during removal?
Smooth the damaged area with fine sandpaper, fill any deep craters with a small amount of wood filler, then seal the blade before re-gluing. It’ll play fine — it just won’t look pretty.
Do I need to sand the blade between rubbers?
No — remove the glue residue by rubbing gently, and that’s enough. Only sand if you’re preparing to seal a blade or repairing damage.
Can I use a hairdryer to speed up drying?
Better not. Uneven heat can cause the glue to skin over while staying wet underneath, which is exactly how you get bubbles. Give it the twenty minutes.
🏓 Unsure Which Rubber Thickness or Sheet to Mount?
Pairing tensor rubbers vs. sticky Chinese topsheets to your blade stiffness decides your trajectory and throw angle. Find the right replacement setup for your style:

Ping Pong Reviewed is an equipment review site covering table tennis and baseball gear. Specifications are checked against manufacturer listings, and prices against live retail pages, before publication.