Best Ping Pong Rubber Glue: 5 Real Water-Based Adhesives
Table of Contents
Finding the Best Ping Pong Rubber Glue
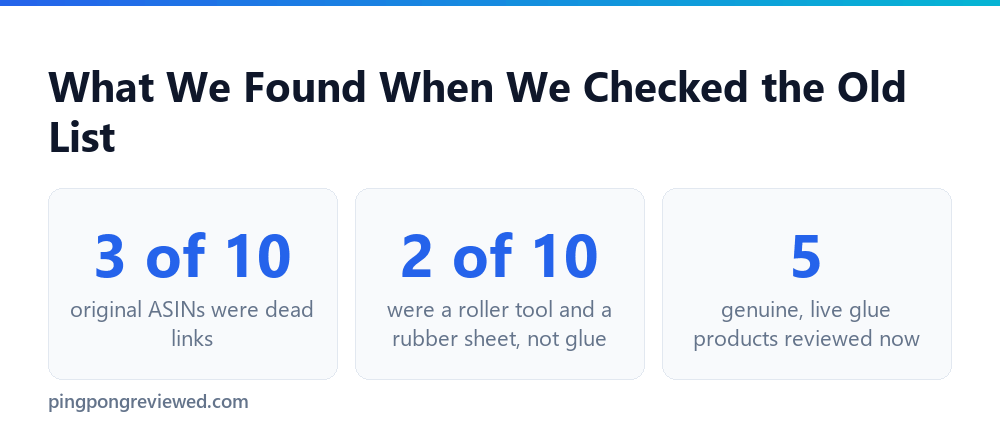
We checked all 10 original ASINs on this best ping pong rubber glue list individually on Amazon. Three were dead links entirely, one was a rubber application roller (a tool, not glue itself), and one was actually a rubber sheet mislabeled with “glue” in its title. That left only three genuine, live glue products, so we sourced two more to build a proper five-pick list.
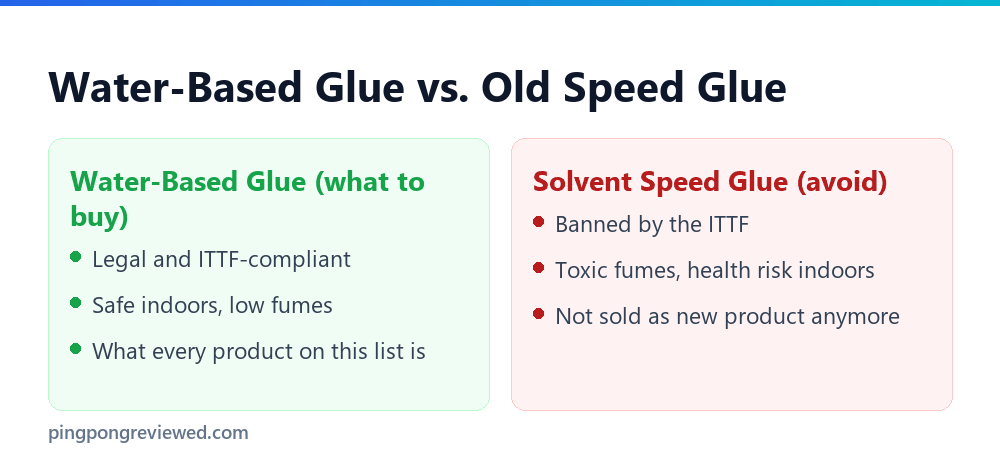
One thing every product on this list has in common, and this matters: they’re all water-based glue. Older “speed glue” used volatile solvents to temporarily boost rubber performance, and it’s been banned by the ITTF for years due to health risks in enclosed spaces. You shouldn’t be able to find genuine solvent speed glue sold as new anymore, and none of these five are.
This matters more than a footnote. Speed glue’s ban wasn’t a performance ruling, it was a health and safety one, the volatile organic compounds it released posed real risks to players and coaches breathing them in repeatedly in enclosed gym spaces over years of regular use. Every manufacturer on this list has moved entirely to water-based formulas as a result, which is now the only legitimate way to mount rubber for competitive or recreational play.
1. HAMAL Water-Based Table Tennis Glue
The budget entry point at around $13. Water-based, non-toxic, and odorless per its own listing, which matters if you’re mounting rubber somewhere without great ventilation. A straightforward, no-frills glue for a first-time rubber swap.
For a first-timer specifically, the lack of strong odor is a bigger deal than it sounds. Some glue formulas, even water-based ones, have a noticeable smell that lingers in a small room, and mounting your first rubber sheet at a kitchen table or bedroom desk is a lot more pleasant with a genuinely low-odor formula like this one.
- ✓Lowest price of the five genuine picks
- ✓Water-based and low-odor
- ✓Enough for several rubber mounts per bottle
- ✕Less established brand than DHS or Butterfly
- ✕Smaller bottle than some competitors
2. GEWO Hydro Tec Table Tennis Glue
GEWO is a well-established German brand in table tennis equipment generally, and Hydro Tec is their water-based glue formula. A reliable mid-tier pick from a brand you’ll recognize from rubber and blade shopping elsewhere on this site.
German manufacturers in this sport tend to compete on consistency and engineering precision rather than aggressive marketing claims, and GEWO fits that pattern. Hydro Tec doesn’t promise dramatic performance boosts the way some listings imply, it just bonds rubber to blade reliably, which is genuinely all a glue needs to do well.
3. DHS Sports No.15 Rubber Glue
DHS is the dominant rubber brand in Chinese national-team-level play, as covered in our rubber-for-poly-balls guide, and their own No.15 glue is ITTF-approved and explicitly VOC-free. If you’re already running DHS rubber, pairing it with DHS glue is a reasonable way to stay within one brand’s tested formula combination.
There’s no hard requirement to match glue and rubber brands, water-based glue generally bonds any rubber to any blade regardless of manufacturer. But if you’ve already committed to DHS’s Hurricane line and want one less variable to think about, using their own glue removes any doubt about compatibility, even if the practical performance difference versus another quality water-based glue is small.
4. JOOLA Table Tennis Rubber X-Glue
JOOLA is one of the most recognized names in table tennis equipment, and their X-Glue is a straightforward, reliable water-based formula. It’s priced higher than the budget picks here, largely on brand reputation and consistency rather than any dramatically different chemistry.
What you’re paying the premium for with a recognized brand like JOOLA is batch consistency, less variation bottle to bottle in tackiness and drying time, which matters more if you’re mounting rubber frequently and want a predictable process every time rather than adjusting technique for each new bottle.
5. Butterfly Free Chack II Table Tennis Glue
Butterfly specifically designed Free Chack II for use with spring sponge rubber lines like Tenergy and Dignics, their own premium rubber. If you’re running Butterfly’s higher-end rubber, using their purpose-matched glue removes one variable if something doesn’t bond quite right.
This is the priciest pick on the list, and that’s largely because it’s sold in larger-volume bottles aimed at clubs and coaches who mount rubber regularly for multiple players rather than a single home user doing an occasional swap. Unless you’re specifically running Butterfly’s spring sponge rubber line or mounting rubber often enough to justify the volume, one of the other four picks will serve a casual buyer just as well for less money.
- ✓Purpose-matched to Butterfly’s spring sponge rubber
- ✓Trusted, well-known brand
- ✓Available in multiple bottle sizes
- ✕Priciest option on this list
- ✕Overkill if you’re not running Butterfly rubber specifically
Applying Rubber Glue the Right Way
Technique matters as much as which glue you buy. A good glue applied unevenly, too thick, or without letting it get tacky first will bond poorly regardless of the brand on the bottle.
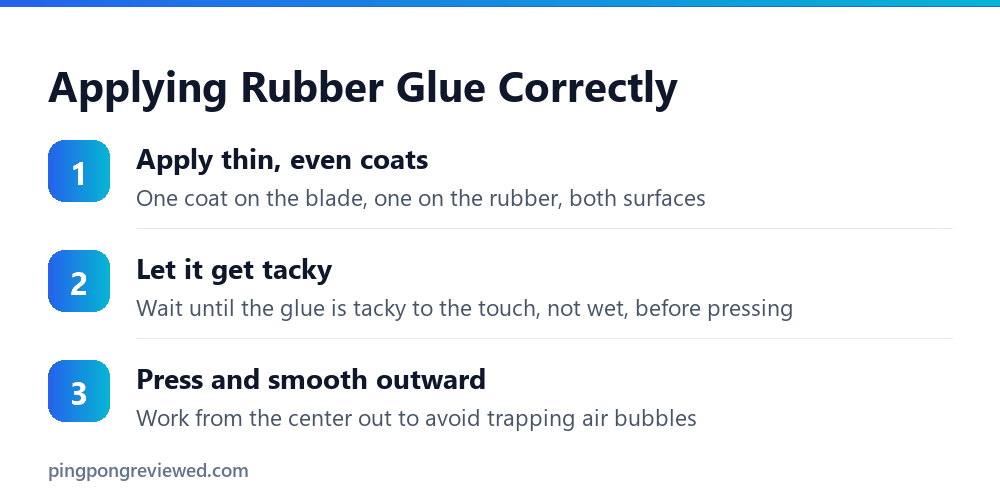
Most water-based glues need to sit for a minute or two after application before they’re ready to press, applying rubber to wet glue traps moisture and weakens the bond. If you’re new to this, budget extra time and don’t rush the tacky stage, a rushed mount is the most common reason a new rubber sheet peels or bubbles within the first few sessions.
Storing Glue and Removing Old Rubber Safely
Keep any of these five glues capped tightly between uses and stored away from direct heat, water-based formulas can thicken or partially dry out inside the bottle if left open or exposed to temperature swings, wasting product before you’ve used it all.
Removing old rubber before mounting new rubber is its own small skill. Peel slowly from one corner rather than yanking, and use a plastic scraper rather than metal to clean old glue residue off the blade, metal tools risk gouging the wood surface underneath. A thin layer of old glue residue is normal and doesn’t need to be removed perfectly, new glue bonds fine over a light residue layer, just avoid leaving thick, uneven old glue clumps that would create an uneven mounting surface.
If you’re removing rubber to inspect or clean the blade itself rather than immediately remounting, let the blade air out for a few minutes before applying fresh glue. This gives any lingering solvent or moisture from the old bond time to fully evaporate, which helps the new glue adhere more evenly across the whole surface.
Which Rubber Glue Fits Your Situation
Mounting your first rubber sheet and want a low-odor, forgiving formula, start with the HAMAL. Want a reliable, no-nonsense pick from a well-known German brand, the GEWO Hydro Tec. Already running DHS rubber and want to stay within one tested combination, the DHS No.15.
Value brand consistency and mount rubber often enough that bottle-to-bottle variation would bother you, the JOOLA X-Glue. And if you’re specifically running Butterfly’s Tenergy or Dignics rubber, or you’re a coach mounting rubber for multiple players regularly, the larger-volume Butterfly Free Chack II is built for that use case.
Why Every Glue Here Is Water-Based
Every product on this page is water-based, and that isn’t a stylistic preference, it reflects what is actually legal and available. Older speed glues contained volatile organic compounds that swelled the sponge and produced a temporary boost in speed and spin. The ITTF banned VOC-containing glues from sanctioned competition, on health grounds as much as fairness ones, and the market moved to water-based adhesives as a result.
Practically, this means the glue you buy today is an adhesive rather than a performance product. It holds rubber to blade, and that’s the job. Any listing promising a speed increase from the glue itself is either describing a banned product or overstating what a modern water-based adhesive does.
The upside of the change is that water-based glues are far more pleasant to work with. They’re low-odour, they don’t require the ventilation precautions solvent glues did, and they’re considerably more forgiving of a slow, careful application, which matters if you’re gluing a sheet for the first time.
The Options Beyond a Bottle of Glue
Liquid glue is the standard route, but it isn’t the only one, and the alternatives suit genuinely different situations.
- Liquid water-based glue: the default. Cheapest per application, works with any rubber and blade, and lets you control coat thickness. Requires drying time and some technique.
- Self-adhesive sheets (glue film): a pre-cut adhesive film applied instead of liquid glue. Far faster, no drying time, no mess, and removable cleanly. Costs more per application and is generally regarded as giving a slightly less lively bond than liquid glue.
- Glue with an applicator sponge included: functionally liquid glue, but the included sponge matters more than it sounds, spreading evenly is most of the technique, and a proper applicator makes a real difference over improvising.
For a player who changes rubber infrequently, self-adhesive sheets are worth considering purely on convenience grounds. For anyone changing rubber regularly, or gluing several bats, liquid glue is substantially more economical and gives more control over the result.
Gluing Rubber Step by Step
The process is not difficult, but it is unforgiving of shortcuts, and nearly every bad result traces back to rushing the drying stage.
- 1. Prepare both surfaces. The blade face and the rubber’s sponge side must be clean and free of old glue residue. Old glue peels off in a sheet if you start an edge and pull slowly.
- 2. Apply a thin, even coat to both surfaces. Both, not one. Use the applicator sponge and work outward from the centre so you don’t build up a ridge at the edges. Thin is the key word, a heavy coat dries unevenly and stays tacky underneath.
- 3. Let both surfaces dry until clear. Water-based glue goes on white and dries transparent. Transparent is the signal. This typically takes several minutes and cannot be usefully rushed with heat.
- 4. Lay the rubber down from one edge. Start at one end and roll the sheet down gradually rather than dropping it flat, which is how air bubbles get trapped.
- 5. Press out from the centre. A roller is ideal; a smooth bottle works. Work centre-to-edge to push any trapped air out rather than sealing it in.
- 6. Trim flush with the blade. Sharp scissors, following the blade edge. Trimming before the glue has fully set risks pulling the sheet out of position.
Two coats on the sponge side are common practice for a stronger bond, letting the first dry fully before applying the second. This is worth doing on new rubber and worth skipping if you expect to remove the sheet again soon, since more glue means a more stubborn removal later.
What Else You Need on the Table
Glue is the consumable, but a decent result depends on a few other items, none of them expensive, and improvising them is where first-time gluing usually goes wrong.
- An applicator sponge or brush. Many glues include one. If yours doesn’t, a dedicated foam applicator costs very little and spreads far more evenly than a finger or a cloth.
- A roller. Purpose-made rubber rollers exist, but a smooth glass bottle or a small paint roller works. The job is even pressure across the whole sheet, not force.
- Sharp scissors. Blunt scissors drag the rubber while cutting and leave a ragged edge that starts lifting sooner. This is the tool most worth not economising on.
- A clean, flat work surface larger than the blade, with good light so you can actually see whether the glue has gone clear.
Some players also keep a straight edge or a craft knife for trimming, which gives a cleaner line than scissors on a straight section but needs more care around the curve of the blade head. Scissors are the more forgiving choice if you’re not confident, and the difference in the finished edge is cosmetic rather than functional.
Temperature, Humidity, and Drying
Water-based glue dries by evaporation, which makes ambient conditions matter more than most players expect. In a cold or humid room, drying takes noticeably longer, and the temptation to call it dry before it’s clear is the single most common cause of a bond that lifts at the edges weeks later.
Room temperature and reasonable dryness are all that’s needed. What isn’t advisable is accelerating drying with a hairdryer or radiator: forced heat dries the surface while leaving the layer beneath tacky, producing exactly the uneven bond you were trying to avoid. If you’re short of time, self-adhesive film is the right answer rather than rushing liquid glue.
Store glue tightly capped and upright, somewhere cool and out of direct sun. Water-based glue that has partially dried in the bottle thickens and applies unevenly, and thinning it with water to salvage it generally weakens the bond rather than restoring the product.
Fixing the Four Things That Go Wrong
Almost every gluing problem falls into one of four categories, and each has a specific cause worth knowing before you assume the glue was at fault.
- Edges lifting after a week or two. Nearly always insufficient drying before the sheet went down, or too thin a coat at the perimeter. Glue tends to get applied generously in the middle and sparingly at the edges, which is exactly backwards from where the stress actually is.
- Air bubbles under the sheet. The rubber was dropped flat rather than rolled down from one edge. Small bubbles can sometimes be worked out to the nearest edge with a roller while the bond is fresh; once set, they stay.
- Sheet sits crooked or overhangs. Position was committed before alignment was checked. Water-based glue allows a little repositioning immediately after contact, so check alignment against the handle before pressing down rather than after.
- Bond feels dead or muted. Usually too much glue rather than too little. Thick glue layers add a damping layer between sponge and blade, which is the opposite of the intent.
The through-line in all four is that patience during application prevents problems that are difficult or impossible to fix afterwards. A gluing job done carefully takes perhaps twenty minutes including drying, and that twenty minutes is the cheapest quality control available on a setup that may have cost well over a hundred pounds in blade and rubber combined.
Removing Rubber Without Damaging the Blade
Removal deserves as much care as application, because this is where blades actually get ruined. The failure mode is tearing away the blade’s top wood veneer along with the rubber, which is permanent and immediately affects how the blade plays.
Peel slowly, from one corner, at a shallow angle, keeping the pull close to parallel with the blade face rather than lifting straight up. If you feel resistance, stop and work the corner further rather than pulling harder. Warmth helps here where it doesn’t help drying, a slightly warm blade releases more willingly than a cold one.
A blade that has been glued and stripped repeatedly benefits from sealing, which puts a protective layer between the wood and future glue and makes subsequent removals much safer. Our blade sealing guide covers when it’s worth doing and how. If you plan to change rubber often, sealing a new blade before its first glue-up is cheap insurance.
If This Is Your First Time
Gluing your own rubber feels like a bigger step than it is, and the main barrier is usually the worry about ruining an expensive blade rather than any real difficulty in the process. A few things make the first attempt much less fraught.
Practise the alignment step dry, without glue, before committing. Lay the sheet on the blade, see how much overhang you have, and get a feel for rolling it down from one edge. That thirty-second rehearsal removes most of the uncertainty from the moment when glue is actually wet and the clock is running.
It’s also entirely reasonable to have a club coach or a local table tennis shop do the first one while you watch. Many will do it for a small fee or nothing at all, and seeing the coat thickness and drying stage done properly once teaches more than any written description, including this one. After that, doing it yourself is straightforward and considerably cheaper over time.
Doing It Yourself vs. Paying a Shop
Not everyone should glue their own rubber, and it’s worth weighing honestly rather than assuming DIY is automatically correct.
Paying a shop makes sense if you change rubber once a year, own a genuinely expensive blade you’d rather not risk, or simply don’t enjoy fiddly manual jobs. The fee is small relative to the cost of the rubber itself, and a shop that does this daily will produce a flatter, cleaner result than a first attempt at home.
Doing it yourself pays off as soon as you’re changing rubber more than a couple of times a year, or want to experiment with different sheets without a trip and a wait each time. The equipment cost is trivial and amortises immediately, and the ability to swap rubber the evening before a match rather than a week before is genuinely useful once your equipment preferences start getting specific.
The middle path most club players end up on: have a shop do it once while you watch, then do it yourself thereafter.
How Often You’ll Actually Need Glue
Worth setting expectations, since a bottle lasts longer than most first-time buyers assume. Rubber typically needs replacing every few months for a player training regularly, and considerably less often for recreational players, which means a single bottle commonly covers a year or more of normal use.
That changes the buying calculation. Since you are not buying frequently, choosing the better product over the cheapest is an easy call, the price difference across a year of use is negligible. What matters more is buying a bottle size you will actually get through before it degrades in storage, since a large bottle used twice a year may thicken before it empties.
For most single-bat players, the smallest bottle a brand offers is the right purchase. Buy larger only if you maintain several bats, coach, or glue for a club.
Shelf Life and Buying in Advance
Water-based glue does not keep indefinitely, which is worth knowing before stocking up during a sale. Once opened, air reaching the bottle gradually thickens the contents, and a glue that has thickened applies unevenly no matter how carefully you work.
Unopened bottles keep considerably longer than opened ones, but they aren’t immune either, and storage conditions matter more than the date printed on the label. Somewhere cool, dark, and stable in temperature will always beat a garage that swings from freezing to hot across the course of a year.
The signals that a bottle has gone are easy to read: noticeably thicker than when new, stringy rather than smooth off the applicator, or refusing to spread into a thin even film. At that point replace it rather than persisting, glue is the cheapest component in the whole operation and a failed bond costs a sheet of rubber worth many times over whatever the saving would have been.
What happened to the original products on this post?
Three of the ten original ASINs were dead links, one was a rubber application roller rather than glue, and one was a rubber sheet mislabeled with ‘glue’ in its title. We kept the three genuine live products and sourced two more.
Is speed glue still legal to use?
No, solvent-based speed glue has been banned by the ITTF for years due to health risks, and it shouldn’t be sold as new anymore. All five products on this list are water-based and compliant.
Do I need different glue for different rubber brands?
Not strictly, most water-based glues work across brands. Some players prefer matching a rubber brand’s own glue, like Butterfly rubber with Butterfly glue, mainly out of consistency rather than a hard compatibility requirement.
How much glue do I need per rubber mount?
A thin, even coat on both the blade and the rubber sheet, roughly a bottle cap’s worth spread thin per side. Most bottles on this list last for several mounts, not just one.
Can I use the same glue on both forehand and backhand rubber?
Yes, there’s no reason to use different glue for each side. The glue choice is independent of which rubber sheet you’re mounting or which side of the blade it’s going on.
How long does water-based rubber glue take to dry?
Most formulas are ready to press within 1-3 minutes of application, once the glue turns from wet and glossy to tacky rather than staying liquid. Full curing for maximum bond strength typically takes a few hours, so avoid hard play immediately after mounting.
Can rubber glue expire?
Yes, water-based glue can dry out, thicken, or lose its bonding strength over time even unopened, typically within a year or two depending on storage conditions. If a bottle has separated or thickened significantly, it’s safer to replace it than risk a weak bond on rubber you’ve already paid for.
Do I need a special applicator or brush?
Most bottles include a built-in applicator tip or sponge, some listings also include a separate sponge or spreader. A basic foam brush works fine too if your bottle doesn’t come with one, the key is even, thin coverage rather than any specific tool.
As an Amazon Associate, we earn from qualifying purchases through links on this page.

Ping Pong Reviewed is an equipment review site covering table tennis and baseball gear. Specifications are checked against manufacturer listings, and prices against live retail pages, before publication.