
How to Make a Ping Pong Shooter Robot: The Simple Version

Table of Contents
How to Make a Ping Pong Shooter Robot, the Simple Way
“Ping pong shooter robot” sounds like it should be the same project as a table tennis training robot, the kind of machine that continuously launches balls for practice. It isn’t, at least not the way we’re building it here. This is a much simpler mechanical project, a spring or rubber-band-powered launcher that fires one ball at a time by hand, no motors, electronics, or programming involved.
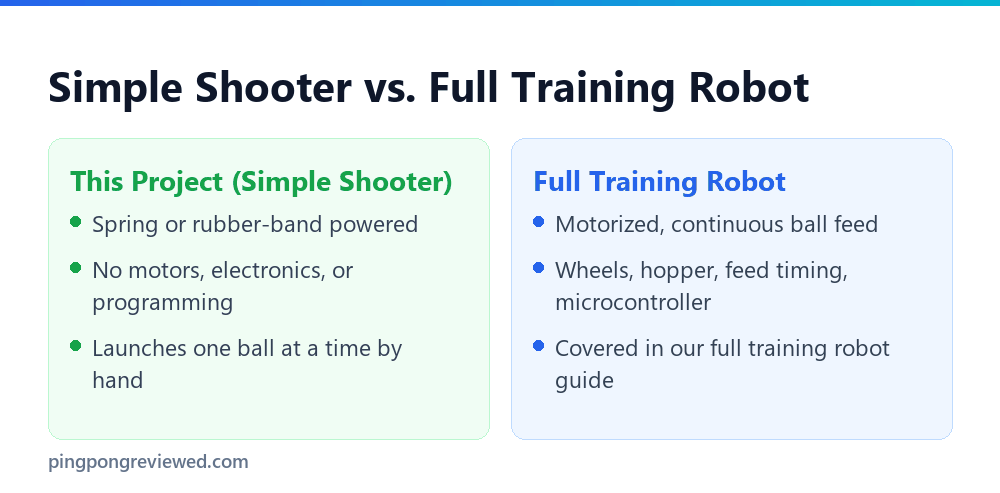
If you actually want the continuous, motorized training robot that automatically feeds and launches balls for real practice, our dedicated training robot guide covers that full build in technical depth, wheel-based launching mechanisms, ball hoppers, feed timing, and microcontroller programming. This page is a genuinely simpler, mechanical-only alternative.
Why Build a Simple Shooter Instead
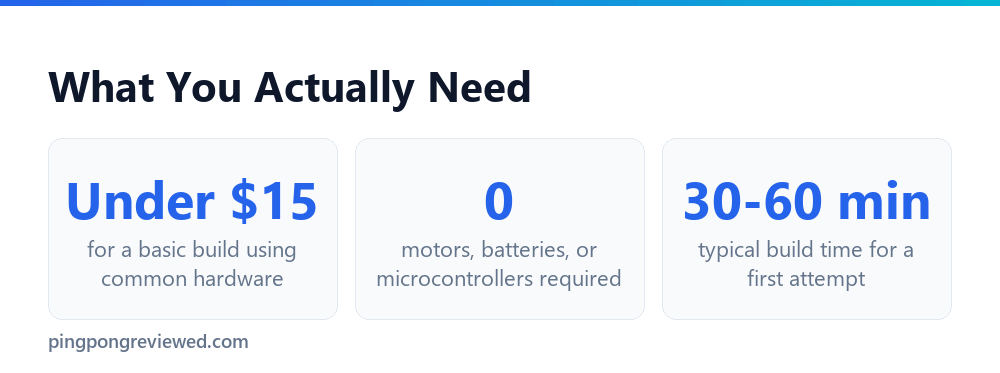
A mechanical shooter is a reasonable starting project if you want something you can build and test in under an hour, without sourcing motors, batteries, or writing any code. It’s also a useful stepping stone if you’re planning to eventually build the full training robot, understanding how a launch mechanism actually propels a ball mechanically makes the electronics-driven version easier to understand later.
It’s also just a fun, quick build on its own terms, a spring-loaded launcher that reliably shoots a ping pong ball across a room is a satisfying afternoon project even without any practical training application.
Materials and Tools
A basic build needs surprisingly little: a sturdy tube or channel slightly wider than a ping pong ball’s 40mm diameter (PVC pipe works well), a spring or several rubber bands for launch power, a simple trigger or release mechanism, and a base to mount everything on, cardboard, wood, or a 3D-printed frame all work.
For tools, you’ll want something to cut your tube material cleanly, a hot glue gun or strong tape for assembly, and a ruler for consistent measurements. Nothing here requires specialized equipment, this is deliberately built around common materials.
Building It, Step by Step
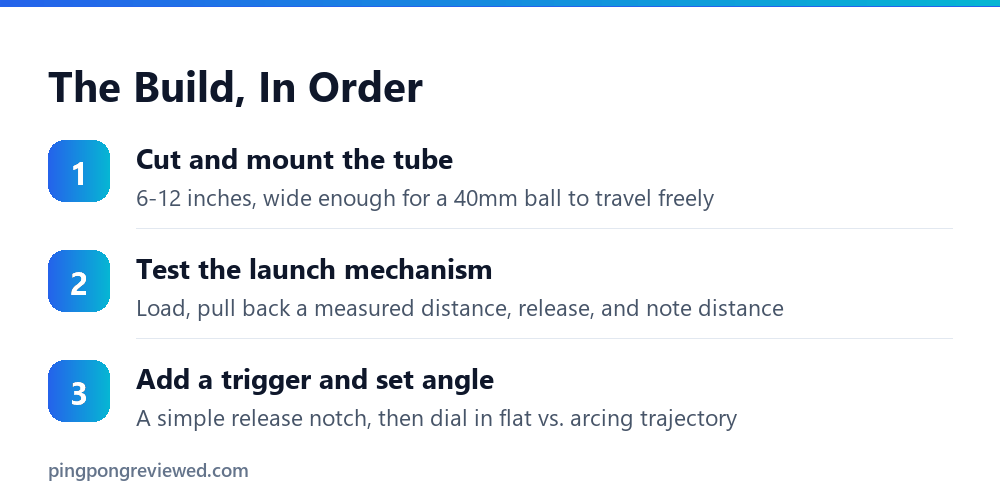
Cut your launch tube to length first, long enough to give the ball a stable, straight path as it’s propelled, but not so long that friction against the tube walls saps most of your launch power. Somewhere between 6 and 12 inches is a reasonable starting range to experiment with.
PVC pipe is the easiest material to source and cut cleanly for this, but a cardboard tube reinforced with tape works fine for a first prototype if you want to test the concept before committing to a more durable build. Whatever material you choose, sand or smooth the inside edge where the ball exits, a rough edge there noticeably reduces launch consistency.
Mount your spring or rubber-band mechanism at the back of the tube, this is the part worth testing incrementally rather than committing to a final design immediately. Load a ball, pull the mechanism back a measured distance, release, and note how far the ball travels before adjusting tension and retesting.
A single strong rubber band anchored at the tube’s closed end, looped around a small pusher disc sized to fit snugly inside the tube, is the simplest mechanism to build and troubleshoot. A real spring gives more consistent power across repeated shots, but costs more and requires a bit more precision to mount securely.
Add a simple trigger, even something as basic as a notch that releases the pulled-back spring or rubber band when you pull a string, makes the shooter meaningfully more satisfying to use than manually releasing the mechanism by hand every time.
A trigger also improves consistency, releasing by hand introduces small variations in exactly when and how the mechanism lets go, while a proper trigger notch releases at the same point every time. That consistency matters more than it might seem if you’re using the shooter for any kind of target practice or distance testing.
Test and adjust launch angle last. A completely flat, horizontal tube gives you distance, angling the tube slightly upward trades some distance for a more arcing shot, which is more useful if you’re using the shooter for a target-practice game rather than pure distance.
Choosing Between a Rubber Band and a Real Spring
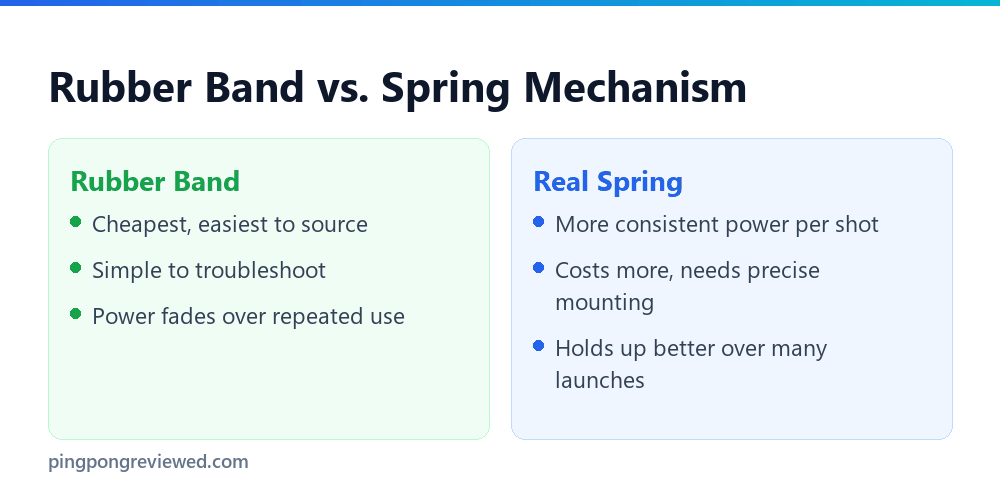
A rubber band mechanism is the right starting point for almost everyone building this for the first time. It’s cheap, forgiving of small mounting mistakes, and easy to replace if it snaps or wears out, none of which is true of a real spring mounted incorrectly.
The tradeoff is consistency over time. A rubber band loses elasticity gradually with repeated stretching, so shot power will drift slightly across a long session and noticeably over weeks of use. A properly mounted extension or compression spring holds its power output far more consistently across hundreds of shots.
If your first rubber-band build works well and you want to upgrade, look for a spring rated for roughly the same stretch distance and tension range you found effective with the rubber band, that gives you a reasonable starting point rather than guessing at spring specifications from scratch.
A Quick Note on Safety
A ping pong ball is light and soft enough that even a well-built shooter poses minimal real risk, but basic sense still applies. Don’t aim it at anyone’s face at close range, and supervise younger builders around the cutting and assembly steps specifically, not the finished shooter itself.
If you’re using a stiffer spring rather than a rubber band, double check the mounting is secure before your first full-power test shot, a mechanism that comes loose under tension is more likely to cause a minor injury than the ball itself ever would.
Wear basic eye protection during initial testing too, especially with a real spring, until you’ve confirmed the mechanism releases predictably and the ball travels in the direction you expect rather than somewhere unintended.
What to Actually Do With It
Beyond the build itself, a simple shooter opens up a few genuinely fun games once it’s working reliably. Target practice with cups or a bucket at a measured distance is the obvious starting point, and it doubles as a way to test and compare different launch tension settings against each other.
For a group activity, take turns adjusting the angle and tension and see who can land the most balls in a target from a fixed distance, a simple scoring system (closer target zones worth fewer points, farther ones worth more) turns the shooter into a genuine backyard or classroom game rather than just a novelty build. It’s a genuinely good group activity for a birthday party or a classroom STEM day, low cost, low risk, and everyone gets a turn quickly.
If you build more than one shooter, distance or accuracy competitions between different designs is a natural next step, and a good way to compare how tube length, mechanism choice, and launch angle each affect performance in practice rather than just in theory.
If the Shot Is Weak or Inconsistent
A shot that’s noticeably weaker than expected usually traces back to friction inside the tube, check that the ball moves freely through the full length by hand before blaming the launch mechanism itself. Sanding rough interior edges or widening a too-tight tube diameter usually fixes this.
Inconsistent distance from shot to shot, even with the same tension setting, usually means the ball isn’t seated the same way each time before launch. Adding a small stop or guide at the loading point so the ball starts from the same position every time removes most of that variation.
What You Actually Need to Build One
Before any assembly steps, it’s worth seeing the whole parts list in one place, because the total cost is what determines whether a build is worth doing at all versus buying an entry-level commercial robot.
- Two DC motors with matched speed ratings. Two counter-rotating wheels is what produces both launch and spin; a single-wheel design launches but gives you far less control.
- Wheels or rubber-rimmed discs to grip the ball. Foam or rubber surfaces grip better than bare plastic, which slips and gives inconsistent launch speed.
- A power supply matched to the motors, plus a speed controller if you want adjustable pace rather than one fixed setting.
- A ball feed mechanism, usually a gravity hopper with a rotating disc or paddle that releases one ball at a time.
- A launch tube, commonly PVC pipe, sized so a 40mm ball passes with a little clearance but not enough to rattle.
- A frame and mount rigid enough to hold the whole assembly steady, plus an adjustable angle mechanism if you want to change trajectory.
Two honest notes on cost. First, the parts add up faster than people expect once you include a controller and a decent power supply. Second, a build only makes financial sense if you already own tools and enjoy the process, if you’re purely after a training aid, entry-level commercial robots covered in our robot guides are frequently cheaper than a competent build and considerably more consistent.
A Build Order That Avoids Rework
Projects like this go wrong less often from any single hard step than from building the parts in an order that forces you to undo earlier work. A sequence that avoids most of that:
- 1. Get the launcher working on the bench first. Two motors, two wheels, hand-fed balls. Confirm you can launch consistently before adding anything else, because every later problem is easier to diagnose against a launcher you know works.
- 2. Add speed control and find your usable range. Note the settings that produce sensible playing speeds; you will size the rest of the build around them.
- 3. Build the frame and mounting. Now that you know the motor positions and vibration behaviour, you can build a frame that fits rather than adapting one you already made.
- 4. Add the feed mechanism last. It is the fiddliest part and the one most likely to need several iterations, so attach it to a launcher and frame that are already settled.
- 5. Add angle adjustment only once everything else works. It is a convenience feature, and adding it early complicates every other adjustment.
The temptation is to design the whole machine on paper and build it in one go. In practice the launcher’s real behaviour, how much the wheels grip, how much vibration they generate, what feed interval the tube tolerates, determines most of the other dimensions, and you only learn those by running it.
The Feed Mechanism Is the Hard Part
Most first builds get the launcher working quickly and then spend the majority of their time fighting the feed. Launching a ball is straightforward, delivering exactly one ball at a reliable interval is not.
The common approach is a rotating disc with a ball-sized notch cut into it, sitting under a gravity hopper. As the disc turns, the notch collects a single ball at the hopper and carries it round to drop into the launch tube. The critical dimension is the notch size: too tight and balls jam, too loose and two balls enter together and jam the launcher instead.
Feed rate is then set by disc rotation speed, which wants to be independently controllable from the launch wheels. Tying both to one motor is simpler to build and much less useful in practice, since it means you cannot have slow balls fed quickly or fast balls fed slowly, which are exactly the combinations training benefits from.
Vibration, Stability, and Consistency
The failure that separates a working build from a useful one is consistency. Two counter-rotating wheels spinning at speed generate real vibration, and a frame that shifts even slightly between shots sends balls to different places from identical inputs, which defeats the entire purpose of a training robot.
- Balance the wheels. An unbalanced wheel introduces vibration that grows with speed and is the most common root cause.
- Mount motors to a rigid frame rather than a flexible panel. Plywood or metal beats thin plastic.
- Add mass to the base. A heavy base absorbs vibration that a light one transmits into movement.
- Clamp the whole unit to the table rather than resting it there, since an unclamped robot walks across the surface as it runs.
Test consistency deliberately once built: run twenty balls at a fixed setting and see how tightly they group. A build that groups well is genuinely useful for drilling. One that scatters is teaching you to chase random balls, which is worse practice than no robot at all.
Drills a Fixed-Feed Robot Is Actually Good For
A home build feeds to roughly one place at a steady rhythm, and that constraint shapes what it is genuinely useful for. Rather than treating the limitation as a shortcoming, it’s worth choosing drills that suit it.
- Stroke grooving. Hundreds of repetitions of one stroke to the same contact point is exactly what a fixed feed provides, and it is how technique becomes automatic.
- Serve-return timing. A consistent incoming pace lets you work on contact timing without also solving placement.
- Endurance and rhythm. Long uninterrupted sets build the stamina that stop-start rallying does not.
- Warming up. A predictable feed is the fastest way to get your stroke and eyes working before a session.
What to avoid is using it for footwork drills that need varied placement. Practising movement against a ball that always arrives in the same place teaches you to stand still, which is the opposite of the intent.
Is It Worth Building At All?
Worth answering directly, since this page exists to help you decide rather than to talk you into a weekend of work.
Build it if the project itself is part of the appeal, if you have the tools and enjoy making things, or if you want something adaptable that you can modify later. A build teaches you a great deal about why commercial robots cost what they do, and that understanding is worth something on its own.
Buy instead if what you actually want is training time. A commercial unit works out of the box, groups consistently, and carries a warranty, and the hours a build absorbs are hours not spent at the table. There is no shame in the second answer, and it is the right one for most players who simply want to practise alone.
Safety and Realistic Expectations
Two spinning wheels driven by DC motors will happily catch a finger or loose clothing, and the hazard is easy to underestimate because the projectile itself is a lightweight plastic ball. Guard the wheels, fit an accessible cut-off switch, and never clear a jam with the power on, which is the moment most injuries in projects like this actually happen.
On expectations: a home build will reliably produce repeatable launches at an adjustable pace, which is genuinely enough for stroke repetition and reaction drills. What it will not do without considerable additional engineering is oscillate across the table, vary spin type on demand, or run programmed drill sequences. Those are the features that justify commercial robots’ pricing, and they are substantially harder than the launcher itself.
Built with that framing, a DIY shooter is a rewarding project and a usable training tool. Built expecting it to replace a commercial robot outright, it tends to disappoint.
Is this the same as a table tennis training robot?
No, this is a much simpler mechanical, spring or rubber-band powered launcher with no motors or electronics. Our dedicated training robot guide covers the full motorized, continuous-feed version for real practice use.
Do I need any electronics for this project?
No, this build is entirely mechanical. If you want a motorized or programmable version, that’s a different, more involved project covered in our training robot guide instead.
How far can a simple spring-powered shooter launch a ball?
It varies with your specific spring tension and tube length, but a well-built basic version can typically launch a ball several feet with consistent, repeatable results once you’ve dialed in the tension.
Can kids build this project?
Yes, with adult supervision for any cutting steps, this is genuinely simpler and more kid-accessible than the full electronic training robot build, no wiring or programming knowledge needed.
Why is my shot weak or inconsistent?
Weak shots usually mean friction inside the tube, check the ball moves freely by hand first. Inconsistent shots usually mean the ball isn’t loaded in the same position every time, adding a simple loading stop at the same point in the tube fixes that reliably.
What can I use this shooter for besides just testing it?
Target practice with cups or a bucket, distance competitions between different builds, or a simple scoring game with multiple target zones at different distances all work well with this kind of simple mechanical launcher.
Should I use a rubber band or a real spring?
Start with a rubber band, it’s cheaper, easier to mount correctly, and simpler to troubleshoot for a first build overall. Upgrade to a real spring later if you want more consistent power across many repeated shots.
Is this project safe for younger builders?
Yes with adult supervision during cutting and assembly specifically. The finished shooter itself poses minimal risk since a ping pong ball is light and soft, just avoid aiming it at anyone’s face at close range and use basic eye protection during initial testing.

Ping Pong Reviewed is an equipment review site covering table tennis and baseball gear. Specifications are checked against manufacturer listings, and prices against live retail pages, before publication.