How to Make a Ping Pong Robot (A Realistic DIY Ball Launcher)
Here’s how to make a ping pong robot realistically: build a ball launcher, not a robot that hits balls back at you — that’s what every commercial robot on the market actually does too. You build it around a gravity-fed hopper, a pair of motorized spinning wheels that grip and fire the ball, and a microcontroller to time the feed and control wheel speed.
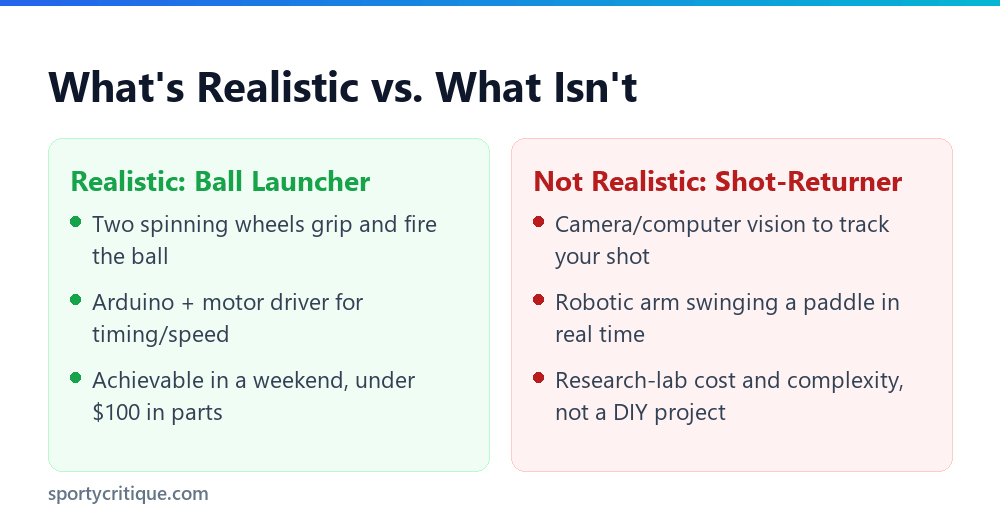
- →Set expectations first: you’re building a ball launcher/feeder, the same mechanism every commercial robot uses — not a machine that detects and returns your shots.
- →The core mechanism is two motorized wheels spinning in opposite directions, gripping the ball briefly and firing it forward with adjustable speed and spin.
- →A basic single-speed, single-direction launcher is a genuinely achievable weekend project; adding oscillation or spin control adds real complexity.
- →Budget for an Arduino or similar microcontroller, two DC motors, a speed controller, and a 3D-printed or hand-built hopper and frame.
Search results for this topic often describe something closer to science fiction: a robotic arm with a camera that tracks the ball and swings a paddle to hit it back. That’s not what any real DIY project — or any consumer robot you can actually buy — does. Real-time shot-returning table tennis robots exist only as research-lab prototypes costing hundreds of thousands of dollars. What you can realistically build is a launcher: it feeds you a ball with adjustable speed and spin, the same job every iPong, Suz, or PONGBOT does.
How to Make a Ping Pong Robot: What You’re Actually Building
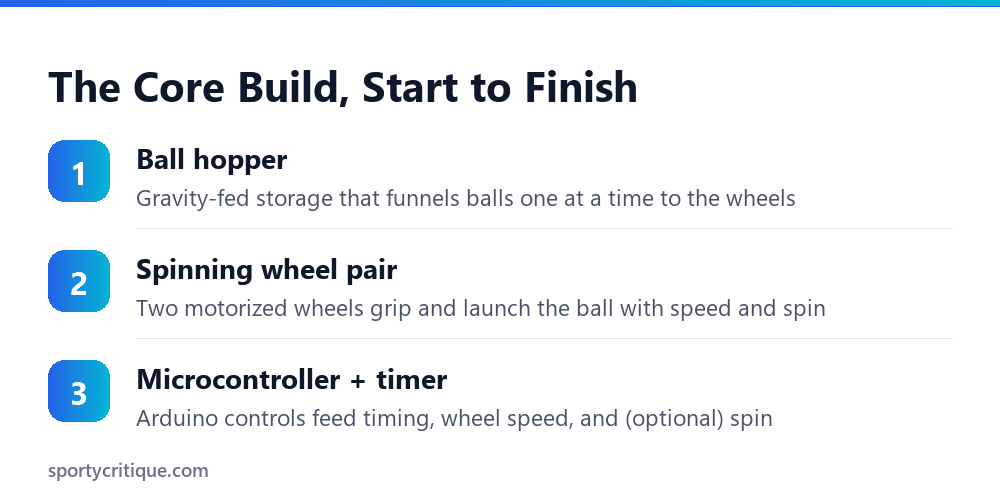
Every real ping pong robot, DIY or commercial, is a ball launcher built around three core parts: a hopper that stores and gravity-feeds balls one at a time, a pair of spinning wheels that grip the ball briefly and fire it forward, and a control system that times the feed and sets wheel speed. Oscillation (moving the launcher side to side for placement variety) and spin control are real add-ons serious builders attempt, but they’re optional complexity layered on top of that core mechanism, not part of a first build.
Tools and Materials You’ll Need
- ✓Two small DC motors (12V gear motors work well) for the launching wheels
- ✓An Arduino Uno or similar microcontroller for timing and speed control
- ✓A motor driver board (like an L298N) to control motor speed and direction
- ✓A gravity-fed hopper — 3D-printed, or built from PVC pipe or sheet plastic
- ✕A servo-driven paddle arm — this describes a shot-returning robot, not a launcher, and isn’t a realistic hobbyist build
- ✕A camera/computer-vision setup for ball tracking — genuinely research-lab-level complexity, skip it for a first project
Building the Wheel-Based Launching Mechanism
The launching mechanism is the actual heart of the build. Two wheels, usually rubber-coated for grip, sit close enough together that a ball passing between them gets squeezed and launched forward by their spin. Both DC motors need a way to spin the wheels fast enough to launch the ball at a usable speed — most hobbyist builds land somewhere in the range of a few thousand RPM at the wheel, geared down from a faster motor. The gap between the wheels controls how firmly the ball gets gripped; too wide and the ball slips through without enough launch force, too narrow and it can jam or crack the ball.
💡 Pro tip: Start with both wheels spinning at the same speed in opposite directions for a straight, spin-free launch. Once that’s reliable, experiment with running one wheel faster than the other — that speed difference is what generates topspin or backspin on the launched ball.
Designing the Ball Hopper
The hopper is simpler than it sounds: a funnel-shaped container that uses gravity to feed balls one at a time down to the wheels. A cone or tapered rectangular shape works, angled steeply enough that balls roll down under their own weight without getting stuck. Most DIY builds either 3D-print this part for a precise fit around the wheels, or build it from PVC pipe and sheet plastic for a lower-cost first attempt. Capacity matters less than a clean single-ball feed — a jammed hopper is the most common failure point in a first build.
Wiring the Feed Timing
Feed timing controls how often a new ball drops into the wheels — this is what creates a steady rhythm of launches rather than one continuous jam of balls. A simple servo-controlled gate or trapdoor at the bottom of the hopper, triggered on a timer by the Arduino, is the most common approach. Start with a slow feed interval (one ball every 2-3 seconds) while you’re still tuning the wheel speed and gap — you can always speed up the feed once the launch itself is consistent.
Choosing a Microcontroller
An Arduino Uno or similar board is the standard choice for this project, and it’s genuinely enough — you don’t need anything more powerful for timing a feed gate and controlling two motor speeds. Program it to run the feed gate on a timer and drive the wheel motors through a motor driver board, which handles the actual current the small Arduino outputs can’t supply directly. Keep the first version of your code as simple as possible: fixed feed interval, fixed wheel speed. Add adjustable potentiometers for speed and interval control only once the basic loop works reliably.
Power Supply Considerations
The two DC motors draw meaningfully more current than the Arduino itself, so plan a separate power supply for them rather than trying to run everything off the Arduino’s own power. A 12V DC power supply rated for at least 2-3 amps covers most small gear-motor setups with margin. Keep the motor power and the Arduino’s logic power on separate rails, connected only through the motor driver board — wiring motors directly off the same supply as your microcontroller risks voltage spikes that can damage the board.
Assembly Order
Testing and Calibration
Test with cheap practice balls before risking good 3-star balls in an untuned mechanism — a wheel gap that’s slightly too narrow can crack a ball on its first launch. Start the wheels at low speed and increase gradually, watching for consistent launch direction and height. A launcher that fires balls at inconsistent angles usually points to uneven wheel wear or a hopper that’s feeding balls off-center rather than straight down between the wheels.
Realistic Difficulty and Cost Expectations
A basic single-speed, single-direction launcher is a genuinely achievable weekend project for anyone comfortable with basic Arduino wiring, typically costing well under $100 in parts if you already own a 3D printer or are comfortable improvising the hopper from PVC. Adding reliable spin control or side-to-side oscillation pushes the project into multi-weekend territory and meaningfully more code. Set your first build’s goal at ‘launches a ball reliably,’ not ‘matches a commercial robot’s feature set’ — that’s a realistic target for a first attempt.
Adding Oscillation for Ball Placement
Once your fixed-position launcher works reliably, side-to-side oscillation is the most common next upgrade — it varies where the ball lands across the table instead of firing to the same spot every time. Mechanically, this usually means mounting the whole wheel-and-motor assembly on a rotating base driven by a slow servo, sweeping back and forth on a timer. This is a genuinely harder problem than the core launcher, since the added weight and vibration of the wheel assembly stresses the servo more than a typical hobby project, so budget real trial-and-error time for this step specifically.
Adding Spin Control
Basic spin control comes from running the two wheels at different speeds rather than matched speeds — the faster wheel imparts more rotation onto the ball as it passes through. Topspin and backspin come from which wheel spins faster relative to the other and the angle at which the ball exits the gap. Getting consistent, predictable spin takes real tuning, usually through trial and error with a scoresheet tracking which motor-speed combinations produced which spin result, since there’s no simple formula that translates directly from motor RPM to spin rate on the ball.
Common Beginner Mistakes
Undersized motors are the most common early mistake — a motor that can’t spin the wheels fast enough produces weak, inconsistent launches no amount of software tuning will fix. Skipping a separate motor power supply is the second most common, since running motors off the same rail as the Arduino often causes random resets or erratic behavior under load. The third is starting with automated speed and spin control before the basic fixed-speed version even launches reliably — get the simple version working first, then add complexity one variable at a time.
Why Not Just Buy One?
🛒 Frequently Bought Together: Complete Paddle Match & Care Kit
When ordering table tennis equipment, tournament competitors frequently bundle protection and maintenance gear in the same Amazon shipment to maintain equipment tack and avoid separate delivery fees:
Selected Tournament Paddle
Your chosen offensive or all-around competition racket
Deluxe Padded Racket Case with Ball Storage
Shockproof zip case with foam protection to prevent chipped edges
Rubber Cleaning Foam Spray & Rejuvenating Sponge
Restores surface tack, dissolves sweat grease, and doubles rubber life
It’s worth being honest about the tradeoff: a basic commercial ball launcher, like the iPong Original, costs less than most people spend on parts and time for an equivalent DIY build, and it works reliably out of the box. Building your own makes sense if the project itself is the goal — learning electronics, motor control, and mechanical design — not if you just want a working launcher as fast and cheap as possible.
Can I really build a robot that returns my shots?
No — that describes a research-lab-level machine costing hundreds of thousands of dollars. A realistic DIY project is a ball launcher, the same mechanism every commercial robot actually uses.
What’s the core mechanism in a DIY ping pong robot?
Two motorized wheels spinning in opposite directions that grip and fire the ball, fed by a gravity-based hopper.
Do I need a camera or computer vision for this project?
No — that’s necessary only for a shot-returning robot, which isn’t a realistic hobbyist build. A launcher needs no vision system at all.
How much does a DIY ping pong robot cost to build?
A basic single-speed launcher typically costs well under $100 in parts; adding spin control or oscillation adds real cost and complexity.
Is it cheaper to just buy a ball launcher?
Usually, yes — a basic commercial launcher often costs less than the parts and time for an equivalent DIY build, so build your own only if the project itself is the goal.
Do I need 3D printing to build the hopper?
No — a 3D printer helps get a precise fit, but a first hopper can be built just as functionally from PVC pipe and sheet plastic.
As an Amazon Associate, we earn from qualifying purchases through links on this page.

Ping Pong Reviewed is an equipment review site covering table tennis and baseball gear. Specifications are checked against manufacturer listings, and prices against live retail pages, before publication.