The Correct Ready Position in Table Tennis: 5 Checkpoints
The ready position is the neutral starting posture a player adopts before receiving the ball. This page follows one coaching source, Expert Table Tennis, which defines it as the generic, neutral stance of feet quite wide apart, knees bent, upper body crouched forward, both arms out in front and the bat in a neutral position, and which notes that many experienced players still have fundamental problems with their stance.
Short answer: According to one coach (Expert Table Tennis): feet 1.5-2 shoulder-widths apart with the non-playing-side foot slightly forward, knees always slightly bent, weight on the balls of your feet rather than your heels, upper body crouched forward with arms out and elbows away from your sides, and the racket held with the top edge pointing toward your opponent.
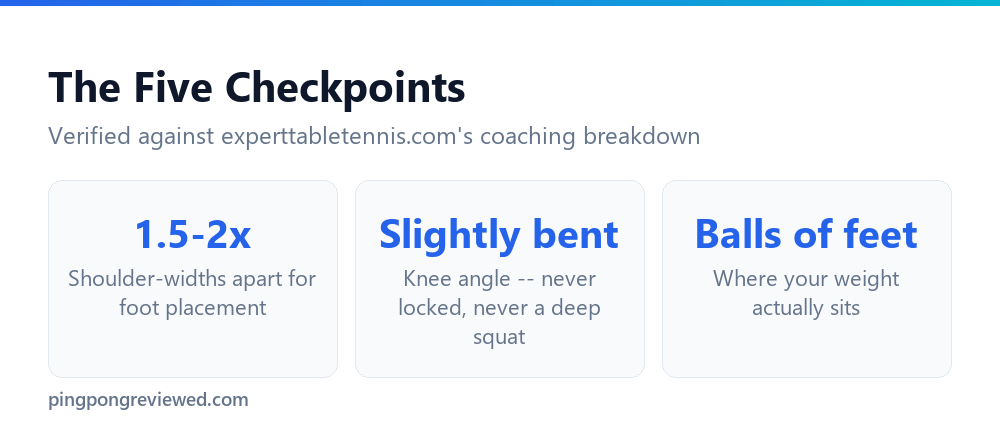
Table of Contents
Foot Placement
Expert Table Tennis recommends feet somewhere between 1.5 and 2 shoulder-widths apart, and notes that some coaches teach one shoulder-width instead. The reasons it gives for the wider base are a more stable stance, easier movement, a lower centre of gravity, and an easier transfer of weight from foot to foot. It also suggests the non-playing foot sits slightly further forward than the playing foot (the left foot for a right-hander), which leaves you not 100% square to the table.
The same source says beginners are far more likely to have their feet too close together than too far apart.
Knee Bend
Expert Table Tennis says knees should always be slightly bent. Completely straight legs, it says, leave a player unable to move to wide balls, and it advises against bending the knees too much or into a squat, since a slight bend is all that is needed.
💡 Pro tip: A useful gut check: if your legs are completely straight, bend them slightly. If it feels like a squat, you have bent them too much.
Weight Distribution
The source describes the forward-leaning crouch as shifting your weight onto your toes (the balls of your feet), which it says makes it much easier to move. It also says weight on the heels is a common reason players drift away from the table, and that if your weight is on your heel, something has probably gone wrong.
📊 Note: The coaching article this page draws on describes the principle (weight forward, on the balls of the feet) without giving an exact percentage split, so none is given here.
Upper Body and Arms
The torso stays crouched, with head and shoulders forward and slightly down. Arms stay out in front of the body with forearms parallel to the ground, and elbows are kept out in front rather than tucked against the sides, which the source says cuts reach for wide balls and the chance of playing a powerful shot.
The same source uses a goalkeeper analogy: pretend you are a goalkeeper ready to receive a penalty, which it says tends to put players in a much better stance, particularly the feet and knees. It then adds a variation to cue the forward-leaning upper body, arms and bat.
Racket Position
The racket is held in a neutral position with its top edge pointing toward your opponent. The source says to keep the wrist straight and let the weight of the racket drop it into a roughly horizontal position, so the racket works as an extension of the forearm. The neutral position matters because you do not know which side the ball is coming to, and it lets you play either a backhand or a forehand on demand.
Why It Is Worth Checking
The source calls the ready position the basics, and says it is the second aspect of technique it teaches, after the grip. It also separates ready position from stance: the ready position is the neutral starting point, while the right stance depends on the stroke being played. Treat the five checkpoints as a starting point rather than a fixed pose.
- ✓Check your stance width periodically during long practice sessions or matches
- ✓Bend your knees consciously if you notice yourself standing too upright
- ✓Keep your racket neutral rather than pre-committing to forehand or backhand
- ✓Treat the ready position as an ongoing habit to maintain, not a one-time lesson
- ✕Assume your ready position stays correct automatically once learned
- ✕Lock your knees straight, even briefly, between points
- ✕Let your elbows drift in against your sides as a session goes on
- ✕Skip re-checking your stance just because it feels familiar
How the Stance Adapts to the Stroke
The source separates the ready position from stance, which it says depends on the stroke being played. Its example: when opening up against a backspin ball with the forehand, a player may start in the neutral ready position but quickly adapt, with the feet slightly wider, the playing-side knee more bent and the playing arm and bat closer to the ground.
The source adds that the general principles stay the same: weight on the heels, a straight back, elbows glued to the sides or knees bent into a squat all suggest the technique is not quite right.
How the Ready Position Changes Between Shots
It’s worth being clear that the ready position isn’t a single static pose held motionlessly throughout a rally, it’s the baseline you return to between shots, adjusting and resetting after each stroke rather than staying frozen in one exact position for an entire point. After hitting a forehand, for instance, the usual coaching aim is to return to this same neutral base before the next shot, rather than remaining wherever the forehand stroke happened to leave them.
This return-to-ready pattern is really what separates a solid ready position from one that only looks correct in a static photo, the real test is whether a player consistently resets to it between shots under the actual pace of a live rally, not just whether they can strike the pose correctly while standing still.
The Short Version, Restated
The five checkpoints from the Expert Table Tennis guidance, all working together: a stance 1.5-2 shoulder-widths wide, knees always slightly bent, weight forward on the balls of your feet, a crouched forward-leaning upper body with elbows away from your sides, and a neutral racket angle. Keeping to these and resetting to them between shots covers the basics of the ready position.
Common Questions
What is the correct ready position in table tennis?
According to one coaching source (Expert Table Tennis): feet 1.5-2 shoulder-widths apart, knees always slightly bent, weight on the balls of your feet, upper body crouched forward, and the racket held neutrally with its top edge toward your opponent.
How wide should my stance be?
One coaching source (Expert Table Tennis) recommends between 1.5 and 2 shoulder-widths apart, for a more stable base; it notes that some coaches teach one shoulder-width.
Should my weight be forward or back in the ready position?
Forward, on the balls of your feet rather than your heels. The source says this makes it much easier to move.
How bent should my knees be?
Always slightly bent, not completely straight and not in a squat. The source says a slight bend is all you need.
Do I need to hold the exact ready position throughout a whole rally?
No, it’s the baseline you return to between shots, adjusting and resetting after each stroke rather than a single frozen pose held for an entire point.
The Short Version
- →Feet 1.5-2 shoulder-widths apart, non-playing-side foot slightly forward.
- →Knees always slightly bent, never locked, never a deep squat.
- →Weight on the balls of your feet, not your heels.
- →Upper body crouched forward, arms out with elbows away from your sides.
- →Racket held neutrally, top edge toward your opponent.
- →The ready position is a baseline to reset to between shots, not a static pose.

Ping Pong Reviewed is an equipment review site covering table tennis and baseball gear. Specifications are checked against manufacturer listings, and prices against live retail pages, before publication.