How to Make a Ping Pong Paddle Out of Cardboard (2026)
If you want to make a ping pong paddle out of cardboard that actually works, this is a real, workable build — good for a craft project, a classroom activity, or a backup paddle for casual pickup games. One thing to get right before you start cutting: you will see an “8 inches by 18 inches” standard size quoted in a lot of places online, and it is wrong by a wide margin. A real paddle is closer to 6 inches wide and 10 inches long including the handle. ITTF rule 2.4.1 does not fix an exact size at all, leaving the size, shape and weight of the racket free so long as the blade is flat and rigid, so 6 x 10 is the practical target rather than a legal requirement.
Table of Contents
An Honest Note Before You Start
A cardboard paddle is a genuine craft project, not a real substitute for an actual paddle in competitive or even serious casual play. Cardboard doesn’t grip the ball the way rubber does, has essentially no spin capability, and softens or delaminates with any moisture exposure, including just hand sweat over a longer session. Treat this as a fun build, a way to introduce a kid to the basic shape and swing of the game, or a genuine emergency backup for one casual game, not as a real paddle replacement for anyone who plays regularly. If you want an actual playable budget paddle instead, our beginner paddle guide covers verified options starting under $20.
The gap between cardboard and a real paddle is really about rubber, not the base material alone. Rubber’s tacky surface grips the ball briefly on contact, which is what makes spin possible in the first place; cardboard’s smooth, hard surface just deflects the ball with almost no grip at all. That’s worth understanding going in, since it explains why even a carefully built cardboard paddle will feel fundamentally different in your hand from a real one, not just cheaper or less durable.
What You’ll Need
- Sturdy corrugated cardboard, at least 2 layers thick — a flattened moving box works well
- A ruler or tape measure
- A pencil for tracing
- Sharp scissors or a utility knife (adult supervision for kids)
- Strong tape (duct tape or packing tape) or hot glue for layering
- Optional: foam sheet or thin craft foam for a slightly better grip surface
- Optional: paint or markers for finishing
The Actual Correct Paddle Size
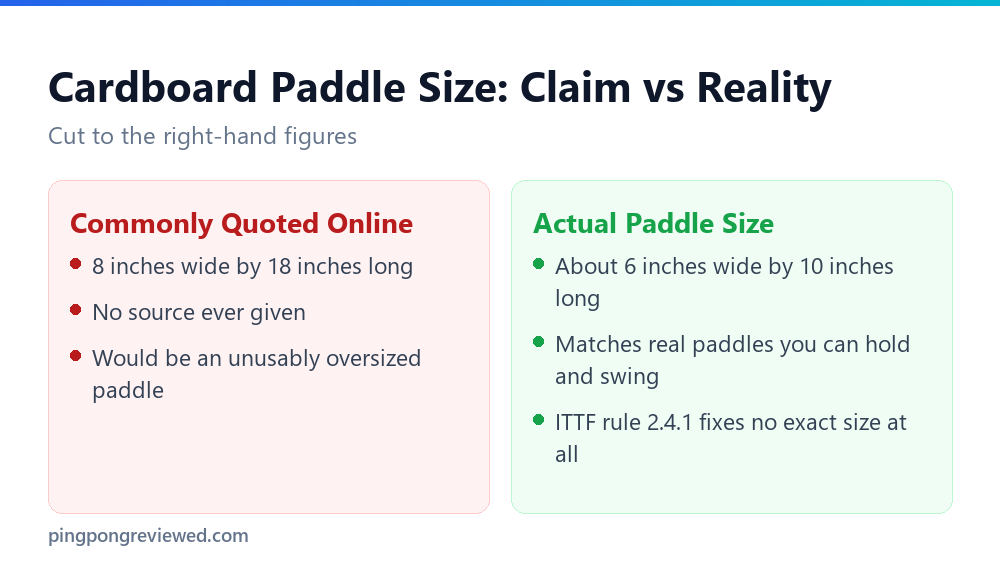
Real paddles run roughly 6 inches (15cm) wide and about 10 inches (25cm) long total, including the handle, with the blade portion itself closer to 6 inches wide by 6 to 7 inches tall. There’s no hard rule you’re violating by going a little larger or smaller on a homemade version, but staying close to these real dimensions will make the finished paddle actually feel and swing like a normal one, rather than the unwieldy oversized shape you’d get from the old incorrect 8×18 measurement.
If you’re building this with or for a kid, sizing down slightly from the adult dimensions above is reasonable and arguably makes for a more comfortable grip for smaller hands. There’s no rule being broken either way, since this is a craft project rather than equipment meant for sanctioned play, but staying in the general neighborhood of real paddle proportions keeps the swing feel recognizable rather than producing something that handles more like a fly swatter than a paddle.
Step-by-Step Build
Step 1: Trace the Template
Draw or print a paddle outline at roughly 6 inches wide and 10 inches long total (blade plus handle), then trace it onto your cardboard twice. You’ll layer two identical pieces together for enough rigidity to hold a swing.
Step 2: Cut Both Layers
Cut out both traced pieces carefully. Corrugated cardboard cuts more easily along the direction of its internal ridges than against them, so orient your template to take advantage of that if you notice the cardboard resisting the blade in one direction.
Step 3: Layer and Bond
Stack the two cut pieces with the corrugation ridges running in opposite directions if possible, which adds real structural rigidity compared to stacking them the same way. Glue or tape the layers firmly together and let any adhesive cure fully before handling.
Step 4: Round the Edges and Reinforce the Handle
Sand or trim the blade edges into a smooth curve rather than leaving sharp corners, both for comfort and because sharp cardboard corners tear easily. Wrap the handle section in extra tape for a firmer grip and to reduce the chance of the layers separating at the point where you’re actually holding it.
Step 5: Finish and Decorate
Paint or decorate however you like once construction is solid. If you want a slightly better ball response than bare cardboard, a thin layer of craft foam glued to each face adds a small amount of give without meaningfully changing the build’s basic craft-project nature.
Test the finished paddle with a few gentle taps before a full swing, checking that the layers haven’t shifted or separated during the gluing and finishing steps. A quick test catches a weak bond point while it’s still an easy fix, rather than discovering it mid-rally when a layer peels away unexpectedly.
Keeping It Usable
- Keep it dry — cardboard loses structural integrity fast once it absorbs moisture, whether from rain, sweat, or a spilled drink.
- Store it flat — leaning it against something for a long stretch can gradually warp the layers.
- Expect a short lifespan — treat this as a project with a few sessions of play in it, not a long-term paddle.
- Re-tape the handle if it loosens — this is normal wear and an easy fix rather than a sign to rebuild from scratch.
Realistically, expect this build to hold up for a handful of casual sessions rather than months of regular use, and treat any noticeable softening or warping as the sign to rebuild rather than keep pushing a deteriorating paddle. That’s a genuine, expected tradeoff of the material, not a sign you did the build wrong, and it’s worth setting that expectation upfront rather than being disappointed when a $0 paddle doesn’t last as long as a $20 one.
How We Corrected This Page
Every paddle dimension on this page is checked against ITTF’s published equipment rules rather than the unsourced “standard size” figures that circulate on craft and how-to sites. Worth being equally clear about performance: a cardboard paddle will not improve your gameplay or agility, whatever some build guides claim. It is a craft material, and it behaves like one.
This is a small but real example of a broader pattern we’ve run into rebuilding older pages across this site: specific numeric claims, sizes, weights, percentages, get repeated confidently in AI-generated content without ever being checked against an actual source, and readers have no way to tell a made-up number from a real one just by how confidently it’s stated. We now check specific numeric claims like this one against their actual governing source, ITTF’s published rules in this case, rather than assuming an existing figure on the page was accurate to begin with.
Frequently Asked Questions
Is there a difference between the red and black sides of a real ping pong paddle?
Yes. ITTF rules require one black side and one clearly different side on a real competition paddle, so opponents can identify which rubber contacted the ball. Since 1 October 2021 that second side may be red, pink, purple, green or blue. A cardboard build has no rubber sides to differentiate, so this rule doesn’t apply to it.
What are real ping pong paddles actually made out of?
A wood or wood-carbon composite blade with rubber sheets glued to each face, each rubber sheet backed by a foam sponge layer that determines speed and control characteristics.
Does cardboard actually work as a ping pong paddle?
For a few casual rallies, reasonably well. For any real spin, consistent bounce, or extended play, no — cardboard lacks the grip and rebound properties rubber provides, and it degrades quickly with any moisture exposure.
What is the actual standard size of a ping pong paddle?
ITTF rules don’t fix an exact size — rule 2.4.1 leaves racket size, shape, and weight free, requiring only that the blade be flat and rigid. Real paddles are typically around 6 inches wide and 10 inches long including the handle.
Why are real ping pong paddles so much more expensive than cardboard?
Real paddles use engineered wood or carbon-composite blades paired with manufactured rubber sheets, both requiring real materials science and manufacturing precision that a cardboard build can’t replicate at any price.
Is this a good beginner project for kids?
Yes, with adult supervision for the cutting steps — it’s a genuinely fun, low-cost introduction to the sport’s basic equipment concept, even though the finished paddle won’t play like a real one.
Can I use a different material instead of cardboard?
Thin plywood or an old wooden cutting board makes a noticeably sturdier and longer-lasting DIY paddle than cardboard, though it requires different tools to cut and shape safely. Cardboard remains the easiest and cheapest starting material for a first attempt.
How long does a cardboard paddle actually last?
Realistically a handful of casual sessions rather than months of regular use, especially with any moisture exposure. Treat it as a short-lifespan craft project rather than a durable piece of equipment.
As an Amazon Associate, we earn from qualifying purchases through links on this page.

Ping Pong Reviewed is an equipment review site covering table tennis and baseball gear. Specifications are checked against manufacturer listings, and prices against live retail pages, before publication.